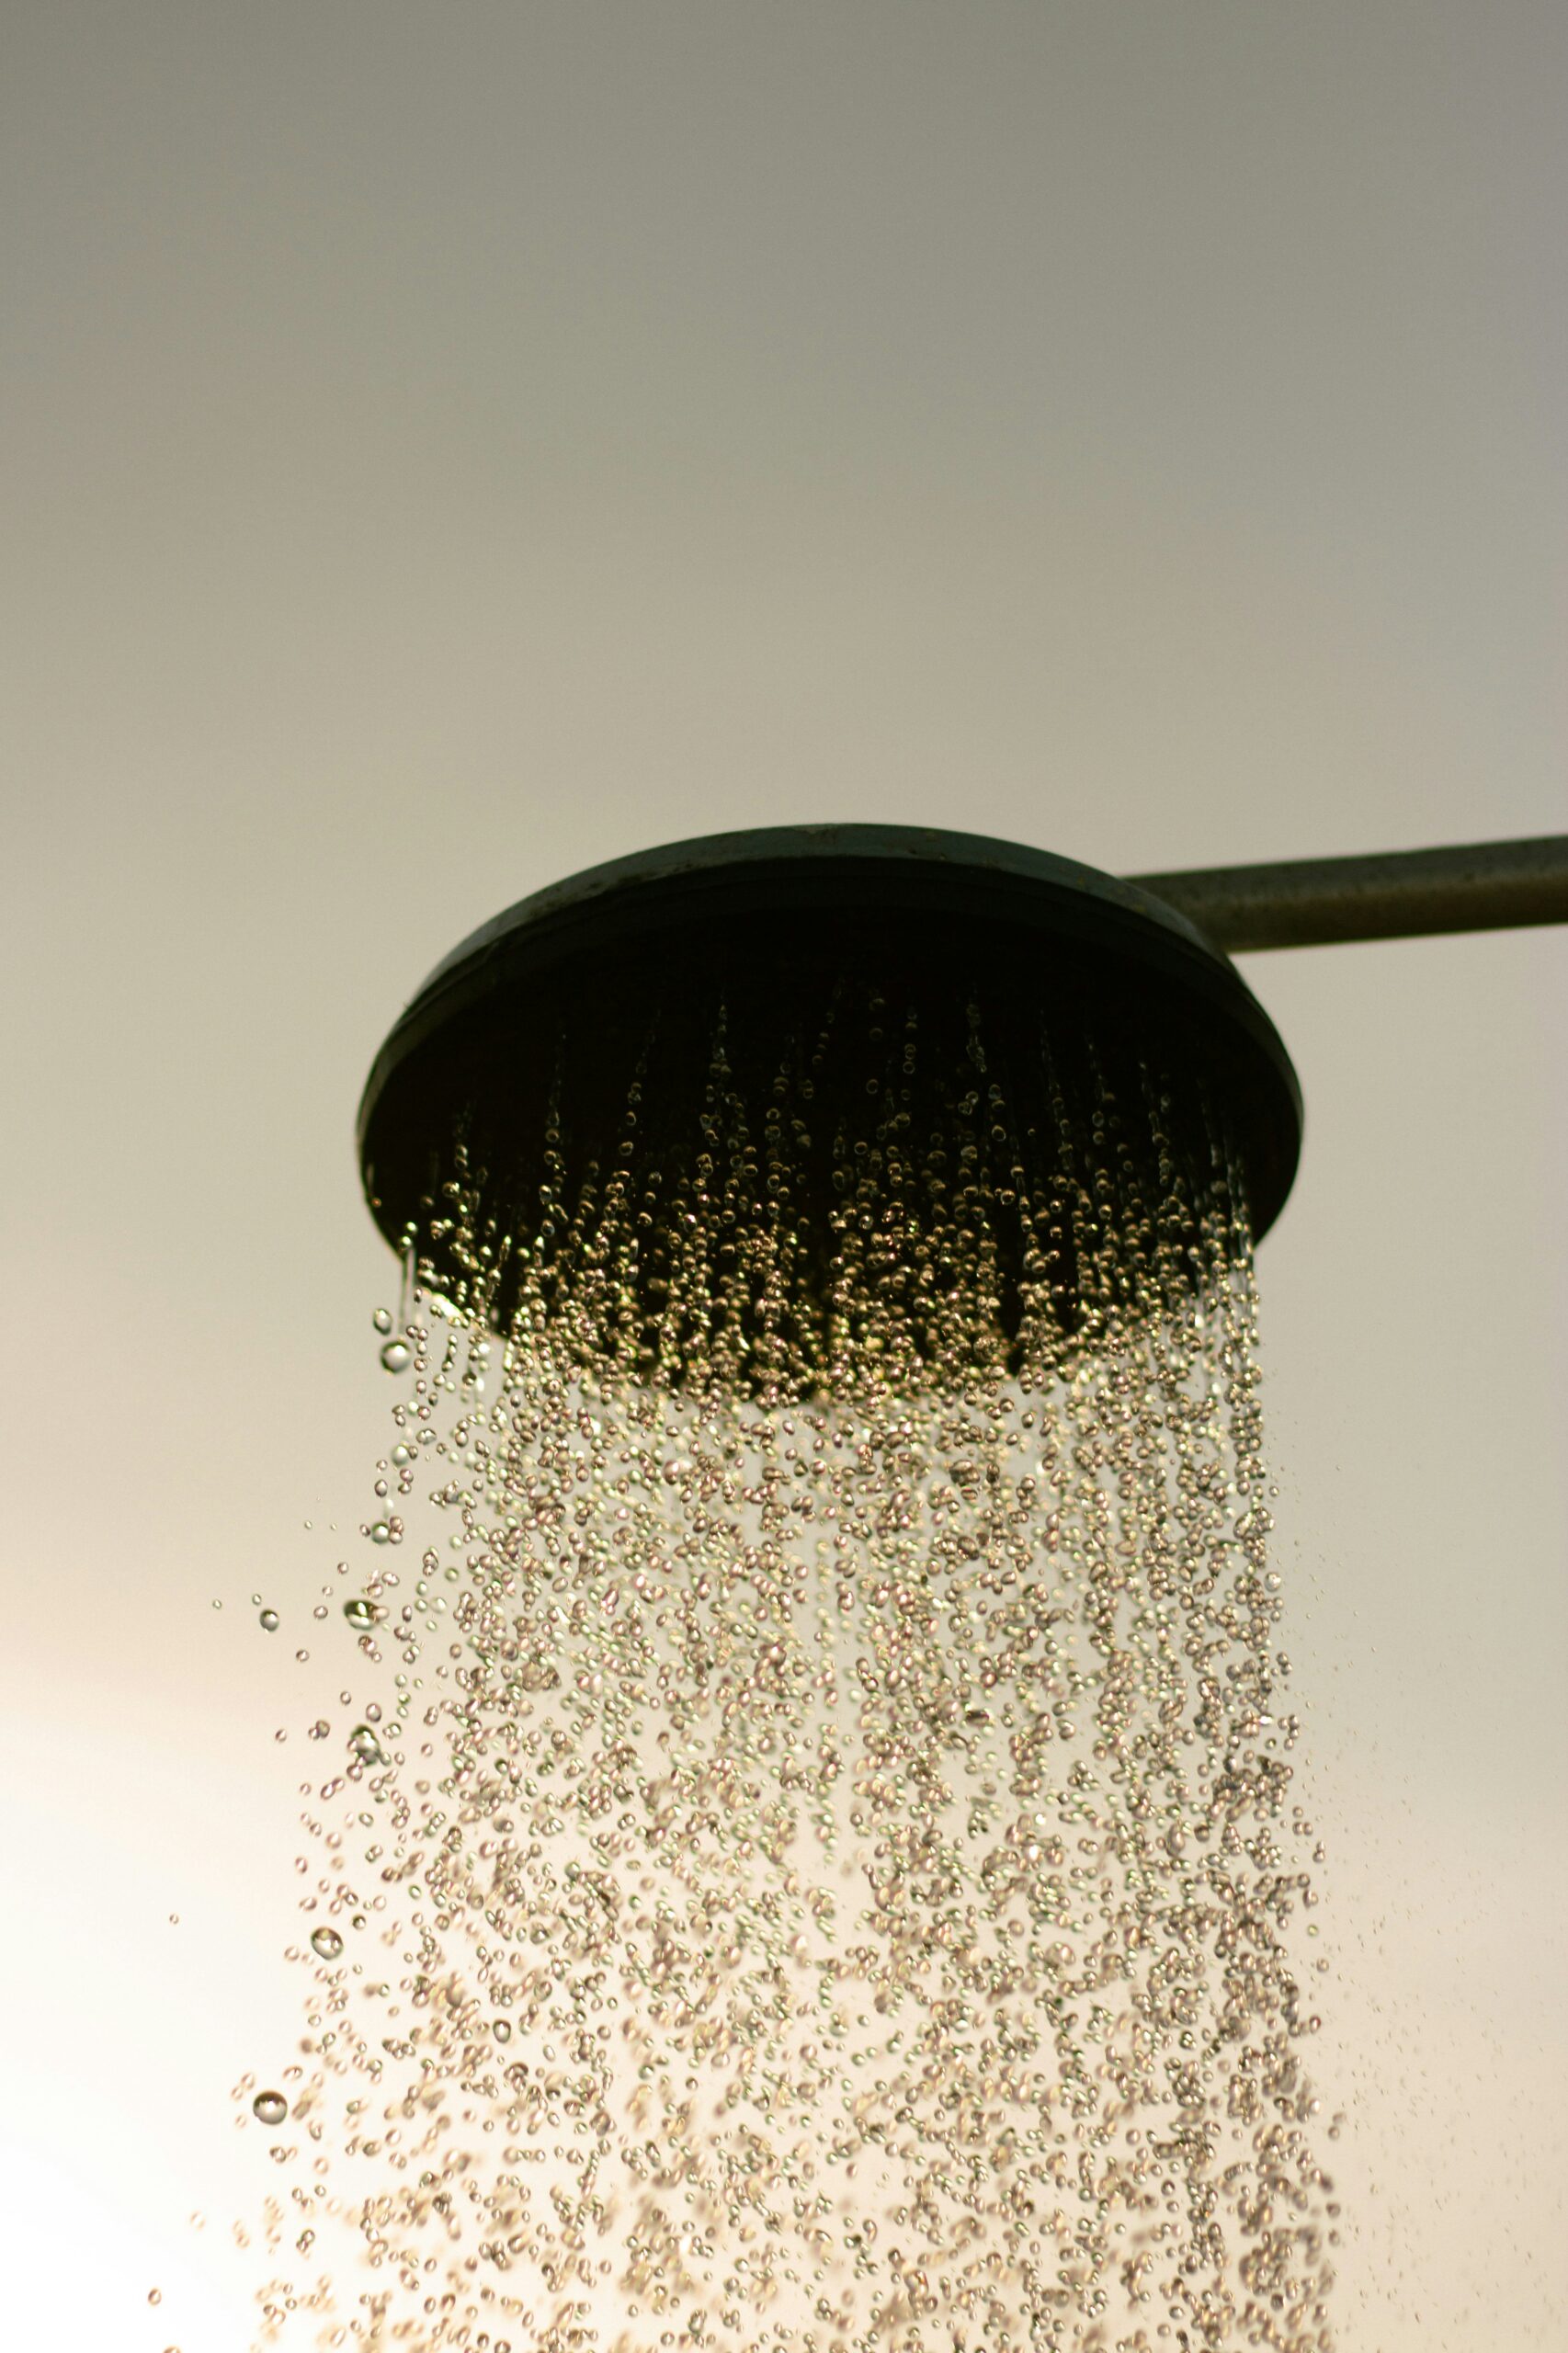
There are a lot of home improvements that cost thousands of dollars and take weeks to complete. Replacing a showerhead is not one of them. It’s one of the quickest, easiest, and most satisfying upgrades you can make in your bathroom.
I spent years complaining about the weak, sputtering shower in my guest bathroom. The water trickled out like a garden hose with a kink in it. I assumed fixing it would require a plumber and a lot of money. Then I bought a new showerhead for $25, watched a five-minute video, and had the old one off and the new one on in about 15 minutes. The difference was like night and day — strong, even water flow that actually made me want to take a shower.
Whether your current showerhead is weak, leaky, crusty with mineral deposits, or just ugly, replacing it is a simple DIY project. You don’t need plumbing experience, and you only need a couple of basic tools.
This guide covers everything you need to know to replace a showerhead, including how to choose the right one, how to remove the old one, and how to install the new one without leaks.
Step 1: Choose a New Showerhead
Before you can replace your showerhead, you need to buy a new one. There are more options than you might expect.
Types of Showerheads
| Type | Description | Price Range | Best For |
|---|---|---|---|
| Fixed mount | Attaches to the wall pipe | $15 – $100 | Standard replacement, simple installation |
| Handheld | Attaches to a hose and bracket | $20 – $150 | Flexibility, rinsing, cleaning, accessibility |
| Rain shower | Large, flat head mounted overhead | $30 – $300 | Luxurious, rainfall-like experience |
| Dual shower | Combines fixed and handheld | $40 – $250 | Best of both worlds |
| High-pressure | Designed to maximize flow | $20 – $80 | Low water pressure |
| Filtered | Removes chlorine and minerals | $30 – $100 | Sensitive skin, hard water |
Flow Rate
Showerheads are rated by their flow rate — how many gallons per minute (GPM) they deliver. Federal law requires that new showerheads have a maximum flow rate of 2.5 GPM at 80 PSI. Many modern showerheads are rated at 2.0 GPM or even 1.5 GPM to conserve water.
Lower flow rate = less water used, but potentially less pressure.
However, a well-designed low-flow showerhead can feel just as powerful as a high-flow one. The design of the nozzles and how they concentrate the water matters more than the GPM rating. Read reviews before buying.
If you have low water pressure, look for a showerhead specifically designed for high pressure. These use smaller nozzles and air infusion to make the water feel more powerful even at lower flow rates.
Connection Type
Almost all showerheads use a standard 1/2-inch NPT (National Pipe Thread) connection. This means any showerhead should fit any standard shower arm. You don’t need to worry about compatibility — if it’s sold as a showerhead in the United States, it will fit your shower arm.
My Recommendation
For a simple, satisfying upgrade, I recommend a fixed-mount showerhead with a flow rate of 2.0 GPM and good reviews for pressure. Brands like Delta, Moen, and Kohler make reliable, affordable options. If you want more flexibility, get a handheld showerhead — they’re great for rinsing the shower, washing pets, and cleaning yourself.
Step 2: Gather Your Tools
You don’t need much for this project:
- Adjustable wrench or pliers
- Old rag or towel
- Teflon tape (also called plumber’s tape or thread seal tape)
- White vinegar (for cleaning the shower arm threads)
- New showerhead (of course)
Optional but helpful:
- Penetrating oil (like WD-40) if the old showerhead is stuck
- A second wrench for counter-holding the shower arm
Step 3: Remove the Old Showerhead
1. Protect the Shower Arm
Wrap a rag around the shower arm (the pipe coming out of the wall) where you’ll be gripping it with the wrench. This protects the finish from scratches.
2. Unscrew the Old Showerhead
Grasp the shower arm with one hand (or a wrench with a rag) to stabilize it. Use your other hand (or a wrench) to turn the showerhead counterclockwise.
Lefty-loosey. Turn it to the left to loosen it.
Most showerheads can be unscrewed by hand. If it’s too tight to turn by hand, use an adjustable wrench. Place the wrench on the nut at the base of the showerhead (where it connects to the shower arm) and turn counterclockwise.
Don’t use too much force. If the showerhead won’t budge, don’t crank on it — you could damage the shower arm or the pipe inside the wall. Apply penetrating oil to the threads, wait 15 to 30 minutes, and try again.
3. Clean the Shower Arm Threads
Once the old showerhead is off, look at the threads on the shower arm. There will probably be old Teflon tape, mineral deposits, and possibly some rust.
- Remove all the old Teflon tape. Use your fingernail or a small brush to scrape it off.
- Clean the threads with white vinegar and an old toothbrush to remove mineral deposits.
- Dry the threads with a rag.
Clean threads ensure a good seal with the new showerhead.
Step 4: Apply Teflon Tape
Teflon tape (thread seal tape) creates a watertight seal between the showerhead and the shower arm. Don’t skip this step — without Teflon tape, the connection will likely leak.
How to Apply Teflon Tape
- Hold the end of the tape against the shower arm threads, about two threads back from the end.
- Wrap the tape clockwise around the threads. Clockwise is critical — when you screw the showerhead on, it turns clockwise. If you wrap the tape counterclockwise, the showerhead will unwrap the tape as you tighten it.
- Overlap each wrap by about half the width of the tape.
- Wrap the tape 4 to 6 times around the threads.
- Pull the tape firmly as you wrap. It should conform to the shape of the threads.
- Press the end of the tape into the threads with your fingers to smooth it down.
Use white Teflon tape (also called “pink” tape for plumbing). It’s thicker and more durable than the thin yellow tape used for gas lines.
Step 5: Install the New Showerhead
1. Screw on the New Showerhead
Thread the new showerhead onto the shower arm by hand. Turn it clockwise (righty-tighty).
At first, just get it started — don’t tighten it all the way. You want to see how many turns it takes and where the showerhead ends up facing.
2. Check the Orientation
For fixed showerheads, you want the showerhead facing down, not angled to one side or the other.
If the showerhead ends up crooked or facing the wrong direction when it’s hand-tight, you have a few options:
- Add or remove Teflon tape — More tape means fewer turns before it’s tight. Less tape means more turns.
- Tighten slightly with a wrench — Often, another quarter to half turn with a wrench will line it up.
- Use the showerhead’s adjustment — Many showerheads have a swivel joint that lets you adjust the angle.
3. Tighten with a Wrench
Once the showerhead is hand-tight and roughly oriented correctly, use a wrench to give it another quarter to half turn. Place the rag over the connection to protect the finish.
Don’t overtighten. You just need it snug enough to not leak. Overtightening can damage the showerhead, the shower arm, or the Teflon tape seal.
4. For Handheld Showerheads
Handheld showerheads have a few extra steps:
- Install the mounting bracket — Screw the bracket onto the shower arm, just like you would a fixed showerhead. Use Teflon tape.
- Attach the hose — Screw one end of the hose to the bracket and the other end to the handheld showerhead. Use Teflon tape on the bracket connection. The hose connections usually have washers inside, so Teflon tape isn’t necessary on the hose ends (but check your instructions).
- Hang the showerhead — Place the handheld showerhead in the bracket.
Step 6: Test for Leaks
1. Turn on the Water
Turn on the shower and let it run for a minute. Check the connection between the showerhead and the shower arm.
2. Check for Leaks
If you see water dripping from the connection, you have a leak. This is usually caused by:
- Not enough Teflon tape — Remove the showerhead, add more tape, and reinstall.
- Teflon tape applied incorrectly — Make sure you wrapped it clockwise and pulled it tight.
- Cross-threaded connection — If the showerhead went on at an angle, the threads may be crossed. Remove it and try again, making sure it threads on straight.
- Damaged threads — If the shower arm threads are damaged, you may need to replace the shower arm (see below).
3. Fix Any Leaks
If the connection leaks, don’t just crank down on it with a wrench. Remove the showerhead, reapply Teflon tape, and try again. Most leaks are fixed by proper Teflon tape application.
How to Replace the Shower Arm
If your shower arm is corroded, damaged, or you want to change the angle or length, you can replace it. This is slightly more involved than replacing the showerhead but still a beginner-friendly project.
1. Remove the Old Shower Arm
Use a wrench to unscrew the shower arm from the wall fitting. Turn counterclockwise. If it’s stuck, apply penetrating oil and wait.
Support the wall fitting. If possible, use a second wrench to hold the fitting inside the wall (if it’s accessible) while you unscrew the arm. This prevents the fitting from turning and breaking the seal inside the wall.
If you can’t access the inside fitting, be careful. If the fitting turns inside the wall, it could cause a leak behind the wall that you won’t discover until water damage appears.
2. Clean the Wall Fitting Threads
Remove old Teflon tape and clean the threads with vinegar and a brush.
3. Apply Teflon Tape
Wrap Teflon tape clockwise around the threads of the wall fitting, just like you did for the showerhead connection.
4. Install the New Shower Arm
Screw the new shower arm into the wall fitting by hand. Turn clockwise. Get it started straight — cross-threading here is a big problem.
Tighten with a wrench. One to two full turns past hand-tight is usually enough. Don’t overtighten.
5. Attach the Showerhead
Apply Teflon tape to the shower arm threads and install the showerhead as described above.
6. Test for Leaks
Turn on the water and check both connections (wall and showerhead).
How to Clean a Showerhead Instead of Replacing It
If your showerhead is in good condition but the water flow is weak or uneven, it may just be clogged with mineral deposits. Cleaning it might solve the problem without buying a new one.
Method 1: Vinegar Soak (Easiest)
- Fill a plastic bag with white vinegar.
- Place the bag over the showerhead so the nozzles are submerged in the vinegar.
- Secure the bag with a rubber band or a zip tie.
- Let it soak for 1 to 2 hours (or overnight for stubborn deposits).
- Remove the bag and turn on the water to flush.
- Use an old toothbrush to scrub any remaining deposits from the nozzles.
Method 2: Remove and Soak
If the showerhead is very clogged, remove it and soak it in a bowl of vinegar overnight.
- Unscrew the showerhead from the shower arm.
- Place it in a bowl or container.
- Pour in enough white vinegar to cover the showerhead.
- Let it soak overnight.
- Scrub with a toothbrush and rinse with water.
- Reinstall with Teflon tape.
Method 3: Clean the Nozzles
Many modern showerheads have flexible silicone nozzles. You can clean these by simply rubbing them with your fingers. The flexible silicone breaks loose mineral deposits. For stubborn deposits, use a toothbrush.
How Much Does It Cost to Replace a Showerhead?
| Item | Cost |
|---|---|
| Basic fixed showerhead | $15 – $40 |
| Mid-range showerhead | $40 – $80 |
| High-end showerhead | $80 – $200+ |
| Handheld showerhead | $20 – $150 |
| Teflon tape | $2 – $5 |
| Total DIY cost | $17 – $205 |
Professional Installation
If you hire a plumber to replace a showerhead, expect to pay $75 to $200, which includes the service call fee and labor. This is a simple 15-minute job, so doing it yourself saves a significant amount of money.
Frequently Asked Questions
Do I need a plumber to replace a showerhead?
No. Replacing a showerhead is one of the easiest plumbing tasks you can do yourself. It requires no special skills and only basic tools. If you can unscrew a lid off a jar, you can replace a showerhead.
Why does my new showerhead have low pressure?
Several possible causes: the flow restrictor is still in place (many new showerheads have a small plastic restrictor inside that limits flow — check your instructions for how to remove it, though this may violate local water regulations), the showerhead isn’t designed for high pressure, or your home has low water pressure overall. If low pressure is a problem throughout your house, you may need a pressure booster or a showerhead designed specifically for low pressure.
Can I use pipe dope instead of Teflon tape?
Pipe dope (pipe joint compound) works, but Teflon tape is cleaner and easier for showerhead connections. If you use pipe dope, apply a thin layer to the male threads only. Wipe away any excess that squeezes out.
How tight should the showerhead be?
Hand-tight plus a quarter to half turn with a wrench. Don’t overtighten — you just need it snug enough to not leak. If it leaks, add more Teflon tape rather than cranking down harder.
Why is water leaking from behind the shower arm?
This indicates a leak at the wall connection, not the showerhead connection. Remove the shower arm, apply fresh Teflon tape to the wall fitting threads, and reinstall. If the leak persists, the fitting inside the wall may be damaged and you should call a plumber.